The Best Fluffy Pancakes recipe you will fall in love with. Full of tips and tricks to help you make the best pancakes.
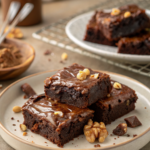
Chocolate Lava Cake Recipe
Decadent chocolate lava cake with a rich molten center.
Have you ever wondered why restaurant desserts seem impossible to recreate at home, especially those molten chocolate masterpieces that ooze perfection with every spoonful? The truth is, creating an impressive Chocolate Lava Cake at home is far simpler than most people believe, and you’re about to discover exactly how to master this show-stopping dessert.
This Chocolate Lava Cake recipe delivers restaurant-quality results with minimal effort, making it perfect for special occasions, romantic dinners, or whenever you crave an indulgent treat. The magic lies in understanding the precise timing and temperature that creates that signature molten center while maintaining a perfectly baked exterior.
Whether you’re an experienced baker or a complete novice, this guide will walk you through every detail needed to create individual chocolate cakes with gloriously gooey centers. The combination of rich chocolate, butter, and eggs creates a dessert that’s simultaneously elegant and comforting.
Ingredients List
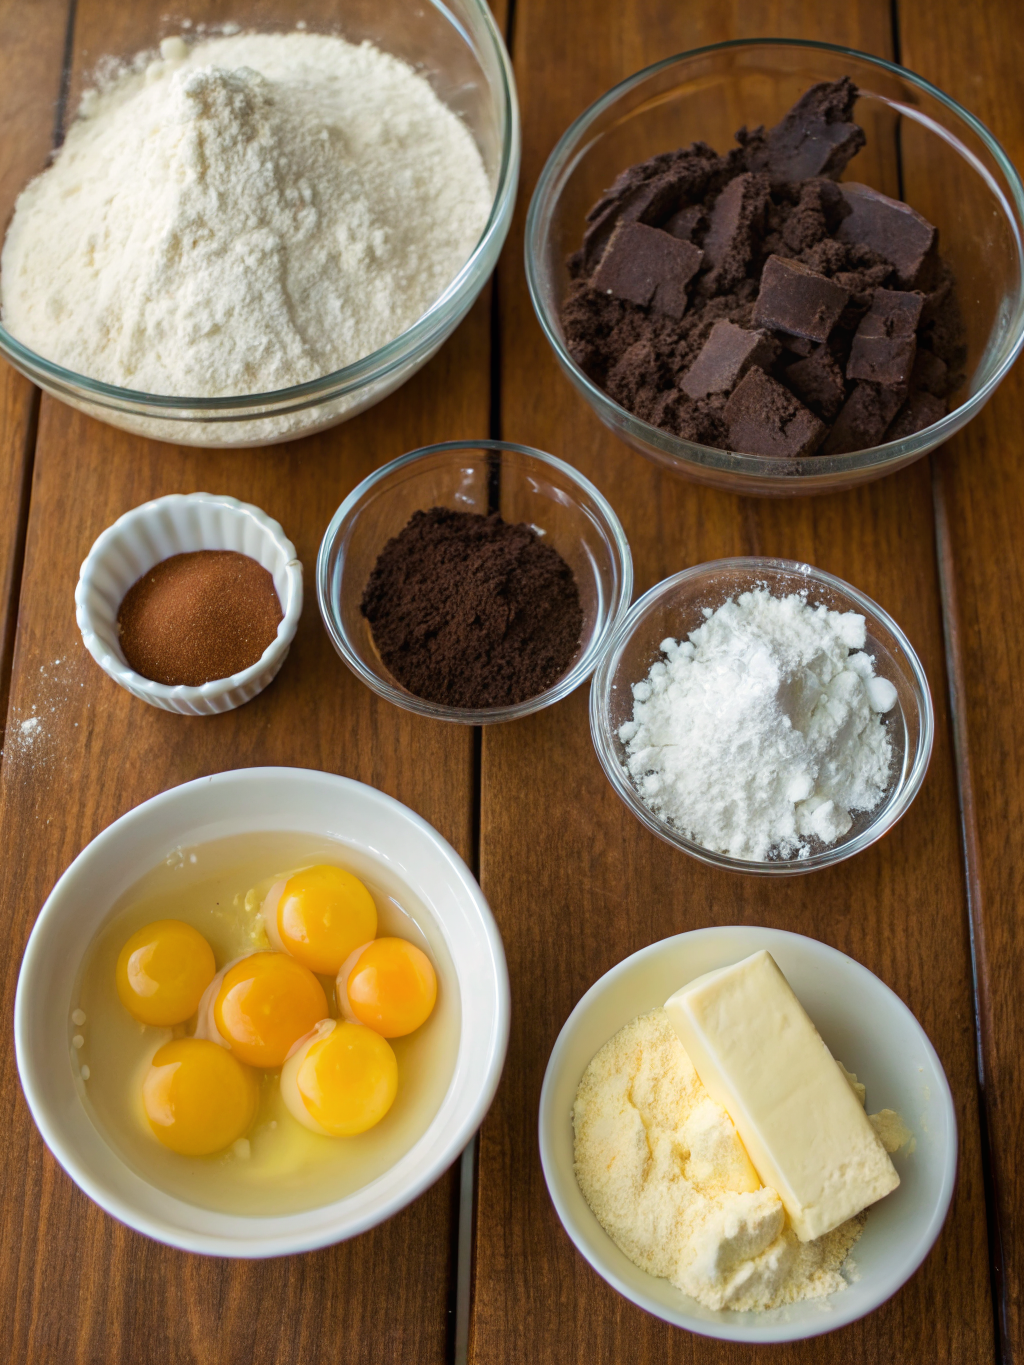
Gathering quality ingredients is essential for achieving the perfect molten center and rich chocolate flavor. Here’s everything you’ll need to create four individual servings:
- 6 ounces (170g) high-quality dark chocolate – Choose chocolate with 60-70% cocoa content for optimal flavor. Semi-sweet chocolate chips can substitute in a pinch, though bar chocolate melts more smoothly.
- 6 tablespoons (85g) unsalted butter – Plus extra for greasing ramekins. Salted butter works if you reduce added salt by half.
- 2 large eggs – Room temperature eggs incorporate more easily and create better texture.
- 2 large egg yolks – These add richness and help create the molten center. Save the whites for meringues or omelets.
- 1/4 cup (50g) granulated sugar – Coconut sugar can substitute for a slightly caramelized flavor profile.
- 2 tablespoons all-purpose flour – Almond flour works for gluten-free versions, though texture differs slightly.
- 1/4 teaspoon salt – Enhances chocolate flavor dramatically; don’t skip this ingredient.
- 1/2 teaspoon vanilla extract – Pure vanilla extract provides superior flavor to imitation versions.
- Powdered sugar for dusting – Optional but adds professional presentation appeal.
The sensory experience begins with the glossy melted chocolate and butter mixture, which releases an intoxicating aroma that promises the decadence to come. Each ingredient plays a crucial role in achieving that perfect balance between cake and flowing chocolate.
Timing
One of the most appealing aspects of this recipe is its efficiency. Total time from start to finish is approximately 30 minutes, which is remarkably quick for such an impressive dessert.
Preparation Time: 15 minutes – This includes melting chocolate, mixing ingredients, and preparing ramekins. With practice, you can reduce this to 10 minutes.
Cooking Time: 12-14 minutes – The precise baking window is critical for achieving molten centers. Ovens vary, so watch carefully during your first attempt.
Total Time: 30 minutes – This represents approximately 40% less time than traditional layer cakes while delivering significantly more impressive results. The quick preparation makes this ideal for last-minute dinner parties or spontaneous celebrations.
Instructions
Step 1: Prepare Your Ramekins and Preheat Oven
Begin by preheating your oven to 425°F (220°C). This high temperature is essential for creating the signature molten center while setting the outer cake layer.
Generously butter four 6-ounce ramekins, ensuring complete coverage including the rim. Dust each with cocoa powder or flour, tapping out excess. This preparation prevents sticking and allows easy unmolding. Place prepared ramekins on a baking sheet for easier oven handling.
Step 2: Melt Chocolate and Butter
Chop the chocolate into small, uniform pieces for even melting. Combine chocolate and butter in a microwave-safe bowl. Microwave in 30-second intervals, stirring between each, until completely smooth and glossy.
Alternatively, create a double boiler by placing a heatproof bowl over simmering water. Stir constantly until melted. The mixture should reach approximately 110°F (43°C) – warm but not hot. Let cool slightly while preparing the egg mixture.
Step 3: Combine Eggs and Sugar
In a separate mixing bowl, whisk together whole eggs, egg yolks, and granulated sugar vigorously for 2-3 minutes. The mixture should become pale, thick, and approximately double in volume.
This aeration process incorporates air that helps create the cake structure. The mixture should form ribbons when you lift the whisk. Add vanilla extract and salt, whisking until fully incorporated throughout.
Step 4: Combine Wet and Dry Ingredients
Pour the slightly cooled chocolate mixture into the egg mixture. Gently fold together using a rubber spatula, using broad strokes from bottom to top. Avoid overmixing, which can deflate the batter.
Sift flour over the chocolate mixture. Fold gently until just combined with no visible flour streaks. The batter should be smooth, glossy, and pourable but thick enough to coat the spatula. Small lumps are acceptable and preferable to overmixing.
Step 5: Fill Ramekins and Bake
Divide batter evenly among prepared ramekins, filling each approximately three-quarters full. Tap ramekins gently on the counter to release air bubbles that could create unwanted holes.
Bake for 12-14 minutes. The edges should appear set and slightly pulled away from ramekin sides, while centers remain soft and jiggly when gently shaken. This timing is crucial – underbaking by even one minute maintains that molten center.
Step 6: Rest and Unmold
Remove from oven and let rest for exactly 1 minute. This brief resting period allows the structure to set slightly while maintaining the liquid center.
Run a thin knife around each cake’s edge. Place a serving plate over each ramekin, then quickly invert while holding both together firmly. Lift the ramekin carefully – the cake should release smoothly. If it sticks, wait another 30 seconds before attempting again.
Step 7: Garnish and Serve Immediately
Dust with powdered sugar using a fine-mesh sieve for elegant presentation. Add fresh berries, mint leaves, or a small scoop of vanilla ice cream if desired.
Serve immediately while the center remains molten. Instruct guests to break into the center with their spoon to release the flowing chocolate – this moment creates the signature « wow » factor that makes Chocolate Lava Cake so memorable.
Nutritional Information
Understanding the nutritional profile helps you make informed decisions about portion sizes and frequency. Each serving contains approximately:
Calories: 420 per serving – This represents about 21% of a 2,000-calorie daily diet. The calorie density comes primarily from chocolate and butter, which provide the rich flavor and texture.
Total Fat: 28g (36% DV) – Including 17g saturated fat. While high, these fats come from quality chocolate and butter rather than processed sources.
Cholesterol: 215mg (72% DV) – Primarily from eggs and butter. Those monitoring cholesterol should enjoy this as an occasional treat.
Sodium: 180mg (8% DV) – Relatively moderate considering the butter content. The salt enhances chocolate flavor significantly.
Total Carbohydrates: 38g (13% DV) – Including 30g sugar. The sugar content creates the dessert’s characteristic sweetness and contributes to texture.
Protein: 7g – Eggs provide complete protein with all essential amino acids. This protein content is higher than many desserts.
Iron: 15% DV – Dark chocolate is surprisingly rich in iron, supporting healthy blood oxygen levels.
Antioxidants: Dark chocolate contains flavonoids and polyphenols that may support heart health when consumed in moderation. Higher cocoa percentages provide greater antioxidant benefits.
Healthier Alternatives for the Recipe
While chocolate desserts are inherently indulgent, several modifications can enhance nutritional value without sacrificing too much decadence. Consider these thoughtful substitutions based on your dietary goals.
Reduce Sugar: Decrease granulated sugar to 3 tablespoons instead of 1/4 cup. The chocolate provides significant sweetness, and this 25% reduction is barely noticeable while saving approximately 50 calories per serving.
Use Dark Chocolate: Choose chocolate with 70-85% cocoa content. Higher percentages contain less sugar, more antioxidants, and more intense chocolate flavor, meaning you need less for satisfaction.
Substitute Whole Wheat Flour: Replace all-purpose flour with whole wheat pastry flour for added fiber. This swap introduces nutty undertones that complement chocolate beautifully while providing 2-3g additional fiber per serving.
Add Vegetables: Surprisingly, 2 tablespoons of pureed avocado or black beans can replace some butter, adding fiber and reducing saturated fat. The chocolate flavor masks these additions completely.
Use Coconut Oil: Replace butter with refined coconut oil for a dairy-free version. While fat content remains similar, coconut oil contains medium-chain triglycerides that metabolize differently than butter fat.
Incorporate Protein Powder: Add 1 tablespoon of unflavored or chocolate protein powder to increase protein content to approximately 12g per serving, making this dessert more satiating.
Reduce Portion Size: Use smaller 4-ounce ramekins and reduce baking time to 10-11 minutes. This creates perfectly portioned servings with approximately 300 calories each.
Serving Suggestions
Presentation elevates this dessert from delicious to unforgettable. Consider these creative serving ideas that appeal to various occasions and preferences.
Classic Elegance: Serve on white plates dusted with powdered sugar and cocoa powder in a decorative pattern. Add three fresh raspberries and a small mint sprig for color contrast and freshness that cuts through richness.
Ice Cream Pairing: Place a small scoop of vanilla bean, salted caramel, or coffee ice cream beside the warm cake. The temperature contrast and complementary flavors create a more complex dessert experience.
Berry Compote: Prepare a quick berry sauce by heating frozen mixed berries with 1 tablespoon sugar until syrupy. The fruit’s tartness balances the chocolate’s richness while adding vitamin C and antioxidants.
Whipped Cream Variations: Top with freshly whipped cream flavored with vanilla, orange zest, or espresso powder. The light, airy texture contrasts beautifully with dense chocolate cake.
Salted Caramel Drizzle: A thin drizzle of salted caramel sauce adds sweet-salty complexity that enhances chocolate flavor. The salt crystals provide textural interest and flavor bursts.
Coffee Service: Serve alongside espresso or strong coffee for an Italian-inspired dessert course. The coffee’s bitterness complements chocolate while providing a sophisticated finish to meals.
Wine Pairing: Pair with dessert wines like Port, late-harvest Zinfandel, or chocolate-friendly red wines. The wine’s sweetness should match or exceed the dessert’s to avoid bitterness.
Common Mistakes to Avoid
Success with molten chocolate cakes depends on precision. These common errors can transform perfection into disappointment, but they’re easily preventable with awareness.
- Overbaking: This is the most frequent mistake. Even 2 extra minutes can transform molten centers into regular cake. Watch carefully and remove when edges are set but centers jiggle slightly.
- Inadequate Ramekin Preparation: Skimping on butter or missing spots causes sticking. Butter should be visible on all surfaces, and flour or cocoa powder should coat completely for easy release.
- Using Low-Quality Chocolate: Chocolate comprises 40% of this recipe, so quality matters tremendously. Avoid chocolate chips designed for baking, which contain stabilizers that affect texture and melting properties.
- Incorrect Oven Temperature: Use an oven thermometer to verify accuracy. Many ovens run 25°F hotter or cooler than settings indicate, dramatically affecting results and timing.
- Overmixing Batter: Excessive stirring after adding flour develops gluten, creating tough, chewy texture instead of tender cake. Fold gently until just combined with no visible flour streaks.
- Skipping the Resting Period: Immediately unmolding causes cakes to break apart. The 1-minute rest allows structure to stabilize while maintaining the molten center’s perfect consistency.
- Using Cold Ingredients: Cold eggs don’t incorporate smoothly, creating uneven texture. Room temperature ingredients blend more uniformly, producing superior results with better rise.
- Inconsistent Ramekin Sizes: Different sizes require different baking times. Using uniform ramekins ensures all cakes finish simultaneously with identical texture and doneness.
Storing Tips for the Recipe
While chocolate lava cakes taste best immediately after baking, proper storage techniques allow advance preparation that simplifies entertaining and reduces stress during dinner parties.
Refrigerating Unbaked Batter: Fill prepared ramekins with batter, cover tightly with plastic wrap, and refrigerate up to 24 hours before baking. Add 2-3 minutes to baking time since batter starts cold. This method is ideal for dinner parties.