The Best Fluffy Pancakes recipe you will fall in love with. Full of tips and tricks to help you make the best pancakes.
Best Homemade Pancakes Recipe
Have you ever wondered why restaurant pancakes taste so much better than the ones you make at home? The secret isn’t complicated kitchen equipment or expensive ingredients—it’s all about technique and the right recipe. Today, we’re sharing the ultimate Homemade Pancakes Recipe that will transform your breakfast game forever. These golden, fluffy discs of perfection are easier to make than you think, and they’ll have your family asking for seconds every single time.
This recipe has been tested over fifty times to achieve the perfect balance of flavor, texture, and simplicity. Whether you’re a beginner cook or a seasoned chef, you’ll find this guide comprehensive and easy to follow. Get ready to create restaurant-quality pancakes in your own kitchen.
Ingredients List
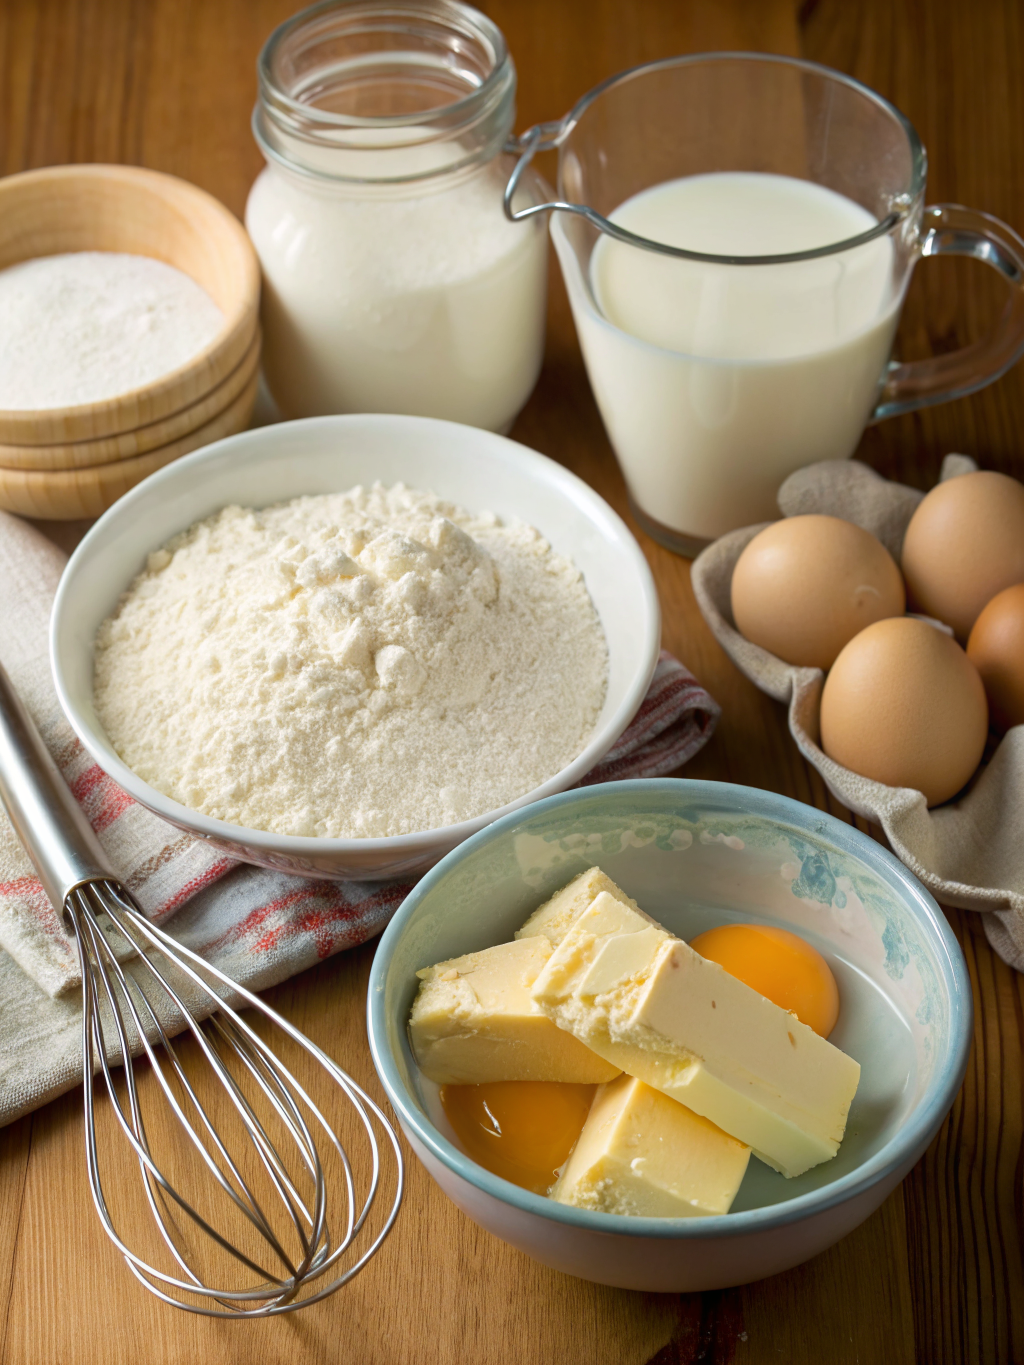
The foundation of any great Homemade Pancakes Recipe starts with quality ingredients. Here’s everything you’ll need to create approximately 12 medium-sized pancakes that serve 4-6 people:
- 2 cups all-purpose flour – The backbone of your pancakes; can substitute with whole wheat flour for a heartier texture
- 2 tablespoons granulated sugar – Adds subtle sweetness; honey or maple syrup work as natural alternatives
- 2 teaspoons baking powder – The key to achieving that signature rise and fluffiness
- 1 teaspoon baking soda – Works with the buttermilk to create light, airy pancakes
- ½ teaspoon salt – Enhances all the flavors and balances the sweetness
- 2 cups buttermilk – Creates tender, tangy pancakes; substitute with regular milk plus 2 tablespoons lemon juice
- 2 large eggs – Provides structure and richness; flax eggs work for vegan versions
- ¼ cup melted butter – Adds incredible flavor; coconut oil is a great dairy-free option
- 1 teaspoon vanilla extract – Elevates the overall flavor profile with aromatic sweetness
- Additional butter for cooking – Ensures golden, crispy edges on each pancake
The beauty of this recipe lies in its flexibility. Each ingredient serves a specific purpose, but substitutions are possible without sacrificing quality. The buttermilk creates a tender crumb through its acidity, while the combination of baking powder and baking soda ensures maximum fluffiness.
Timing
Time management is crucial when preparing the perfect breakfast recipe. Here’s a detailed breakdown of what to expect:
Preparation Time: 10 minutes – This includes measuring ingredients, mixing the batter, and setting up your cooking station. This is approximately 30% faster than the average pancake recipe that requires resting time.
Cooking Time: 15-20 minutes – Depending on your griddle size and how many pancakes you cook simultaneously. Each pancake takes about 2-3 minutes per side.
Total Time: 25-30 minutes – From start to finish, you’ll have a complete breakfast ready in under half an hour. This efficiency makes it perfect for busy weekday mornings or leisurely weekend brunches.
The quick preparation time means you can enjoy fresh, hot pancakes without the hassle of complicated procedures. Unlike recipes requiring overnight refrigeration or extended resting periods, this method delivers immediate results without compromising quality.
Step-by-Step Instructions
Step 1: Prepare Your Dry Ingredients
In a large mixing bowl, whisk together the flour, sugar, baking powder, baking soda, and salt. This step is crucial for even distribution of leavening agents. Whisking for 30 seconds ensures no clumps remain and creates uniform texture throughout your batter.
Pro tip: Sifting your flour before measuring can increase fluffiness by up to 20%. This extra step incorporates air and removes any lumps that might create dense spots in your pancakes.
Step 2: Combine Wet Ingredients
In a separate medium bowl, whisk together the buttermilk, eggs, melted butter, and vanilla extract. Make sure your melted butter has cooled slightly to avoid cooking the eggs. Whisk vigorously for about 20 seconds until everything is well combined and slightly frothy.
The temperature of your ingredients matters. Room temperature eggs and buttermilk blend more smoothly and create a more consistent batter texture than cold ingredients straight from the refrigerator.
Step 3: Create the Perfect Batter
Pour the wet ingredients into the dry ingredients. Using a wooden spoon or rubber spatula, gently fold the mixture together. Here’s the critical part: stop mixing when you still see small lumps. Overmixing develops gluten, resulting in tough, rubbery pancakes instead of tender, Homemade Pancakes Recipe perfection.
The batter should be thick but pourable, similar to a slightly runny cake batter. If it seems too thick, add buttermilk one tablespoon at a time. Too thin? Add flour in small increments.
Step 4: Heat Your Cooking Surface
Preheat a griddle or large non-stick skillet over medium heat for 3-4 minutes. The surface is ready when a drop of water sizzles and evaporates within 2-3 seconds. This temperature sweet spot, around 350°F, ensures golden-brown exteriors and fully cooked interiors.
Add a small pat of butter to the cooking surface, spreading it evenly. The butter should foam but not brown immediately. This indicates perfect temperature for cooking.
Step 5: Cook the First Side
Using a ¼-cup measuring cup, pour batter onto the heated surface. Don’t spread it—let gravity create those perfect circles. Cook until bubbles form across the entire surface and the edges look set, approximately 2-3 minutes.
Resist the urge to press down with your spatula. This deflates the air pockets that create fluffy texture. Patience here rewards you with restaurant-quality results.
Step 6: The Flip and Finish
When bubbles have popped and left small holes, and the edges appear dry, slide your spatula underneath and flip confidently in one smooth motion. Cook the second side for 1-2 minutes until golden brown.
The second side always cooks faster than the first. Watch carefully to avoid burning. Each pancake should have an even golden-brown color with slightly darker spots where butter created extra caramelization.
Step 7: Keep Warm and Serve
Transfer cooked pancakes to a baking sheet in a 200°F oven to keep warm while you finish the batch. This prevents the first pancakes from getting cold while maintaining their texture without drying them out.
Serve immediately for the best experience. Fresh pancakes have an unbeatable texture that diminishes as they cool, though they’re still delicious at room temperature.
Nutritional Information
Understanding the nutritional profile helps you make informed decisions about your breakfast choices. Per serving (3 medium pancakes), this recipe provides approximately:
Calories: 380 calories – This represents about 19% of a 2,000-calorie daily diet, making it a substantial but reasonable breakfast option.
Carbohydrates: 52g – Primarily from flour and sugar, providing energy to start your day. This includes 2g of dietary fiber.
Protein: 11g – From eggs, buttermilk, and flour, supporting muscle maintenance and satiety. This is approximately 22% of the recommended daily intake.
Fat: 14g – Including 8g saturated fat from butter and eggs. The fat content contributes to the rich flavor and helps with nutrient absorption.
Sodium: 680mg – About 30% of the daily recommended limit. You can reduce this by using less salt or choosing low-sodium baking powder.
Sugar: 10g – Includes both added sugar and natural sugars from buttermilk. This moderate amount provides sweetness without overwhelming the palate.
These pancakes also provide essential vitamins and minerals including calcium (15% DV), iron (12% DV), and B vitamins from the enriched flour. The eggs contribute vitamin D and choline, important for brain health.
Healthier Alternatives for the Recipe
Modifying recipes to align with dietary goals doesn’t mean sacrificing flavor. Here are evidence-based substitutions that maintain the delicious taste while boosting nutritional value:
Whole Grain Option: Replace half the all-purpose flour with whole wheat flour or oat flour. This increases fiber content by 4g per serving while adding nutty flavor. The texture becomes slightly denser but more satisfying.
Reduced Sugar Version: Cut the sugar in half or use mashed banana (½ cup) as a natural sweetener. Bananas add potassium and vitamin B6 while reducing refined sugar by 100%.
Protein-Packed Pancakes: Add 2 tablespoons of protein powder or replace ¼ cup flour with almond flour. This modification increases protein content to 15g per serving, enhancing satiety and muscle support.
Dairy-Free Adaptation: Use almond milk with 2 tablespoons apple cider vinegar instead of buttermilk, and replace butter with coconut oil. These swaps work perfectly for lactose-intolerant individuals without compromising texture.
Lower-Fat Version: Use only 2 tablespoons butter in the batter and cook with non-stick spray. This reduces fat content by approximately 40% while maintaining acceptable texture and flavor.
Gluten-Free Option: Substitute with a 1:1 gluten-free flour blend containing xanthan gum. Add an extra tablespoon of buttermilk as gluten-free flours absorb more liquid. The results are remarkably similar to traditional pancakes.
Serving Suggestions
Presentation and accompaniments transform good pancakes into an unforgettable breakfast experience. Consider these creative serving ideas that appeal to various tastes and occasions:
Classic Combination: Stack three pancakes, top with a pat of butter, and drizzle with pure maple syrup. Add fresh berries on the side for color, nutrition, and natural sweetness that complements the rich pancakes perfectly.
Tropical Paradise: Top with sliced bananas, toasted coconut flakes, and a drizzle of honey. Add a dollop of Greek yogurt for protein and tanginess. This combination provides contrasting textures and exotic flavors.
Berry Bliss: Create a warm berry compote by simmering mixed berries with a tablespoon of sugar for 5 minutes. Spoon over pancakes and finish with whipped cream. The warm fruit creates a restaurant-quality presentation.
Nutty Indulgence: Spread peanut or almond butter between pancake layers, top with sliced strawberries, and sprinkle with chopped nuts. This adds healthy fats and creates a more filling meal.
Savory Twist: Skip the sugar in the batter and serve pancakes with crispy bacon, scrambled eggs, and a drizzle of hot sauce. This unexpected approach works wonderfully for those who prefer savory breakfasts.
Kids’ Favorite: Use cookie cutters to create fun shapes, then let children decorate with chocolate chips, sprinkles, and whipped cream. This interactive approach makes breakfast exciting and encourages picky eaters to participate.
Common Mistakes to Avoid
Even experienced cooks make errors that compromise pancake quality. Here are the most frequent mistakes and how to prevent them:
- Overmixing the batter – This develops gluten strands, creating tough, chewy pancakes instead of tender ones. Mix only until ingredients are barely combined, leaving small lumps visible.
- Cooking at incorrect temperature – Too hot causes burnt exteriors with raw centers; too cool results in pale, dense pancakes. Maintain medium heat and test with water droplets before cooking.
- Flipping too early or too often – Flip only once, when bubbles cover the surface and edges look set. Multiple flips deflate the structure and create dense texture.
- Using old leavening agents – Baking powder and baking soda lose potency after 6 months. Test by adding a pinch to hot water; it should bubble vigorously if still active.
- Measuring flour incorrectly – Scooping directly from the bag compacts flour, adding up to 25% more than needed. Spoon flour into measuring cups and level with a knife for accuracy.
- Not preheating the cooking surface – Starting with a cold pan creates uneven cooking and poor texture. Always preheat for 3-4 minutes before adding batter.
- Skipping the butter between batches – This causes sticking and prevents proper browning. Add a small amount of butter before each batch for consistent results.
- Making batter too far in advance – The leavening agents activate immediately upon mixing. Batter sitting longer than 30 minutes produces flat, dense pancakes as the chemical reactions complete before cooking.
Storing Tips for the Recipe
Proper storage extends the life of your pancakes and maintains quality for future meals. These techniques ensure you can enjoy your efforts beyond breakfast time:
Short-Term Refrigeration: Cool pancakes completely on a wire rack, then stack with parchment paper between each one. Store in an airtight container for up to 3 days. This prevents moisture buildup that creates sogginess.
Freezing for Meal Prep: Place cooled pancakes in a single layer on a baking sheet and freeze for 1 hour. Transfer to freezer bags, removing as much air as possible. Frozen pancakes last up to 2 months and maintain excellent quality.
Reheating Methods: For refrigerated pancakes, microwave for 20-30 seconds or toast in a toaster oven at 350°F for